The following step-by-step tutorial will guide you to build a simple web application using spring boot and MySQL
Note
- This tutorial assumes you have installed MySQL
Requirements
- Eclipse Oxygen
- Java 1.8
1] Create eclipse maven project
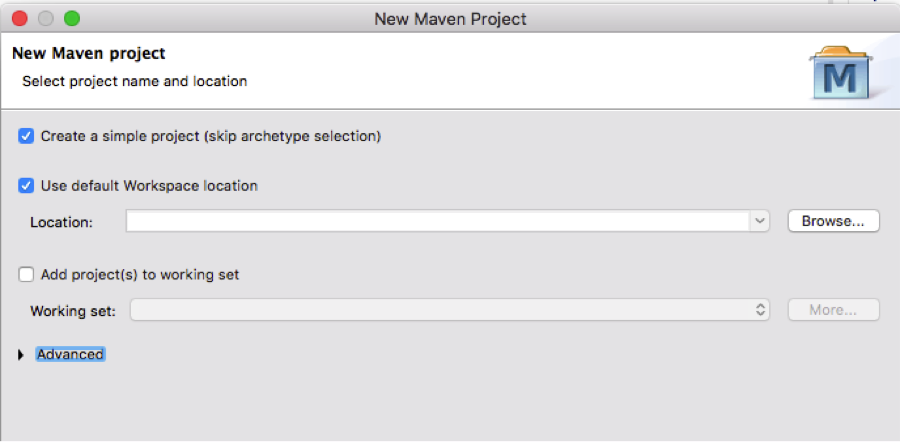
- Open eclipse oxygen, go to File->New->Project
- Maven->Maven Project->click Next
- Make sure you select checkbox "Create a simple project (skip archetype selection)"
- click Next
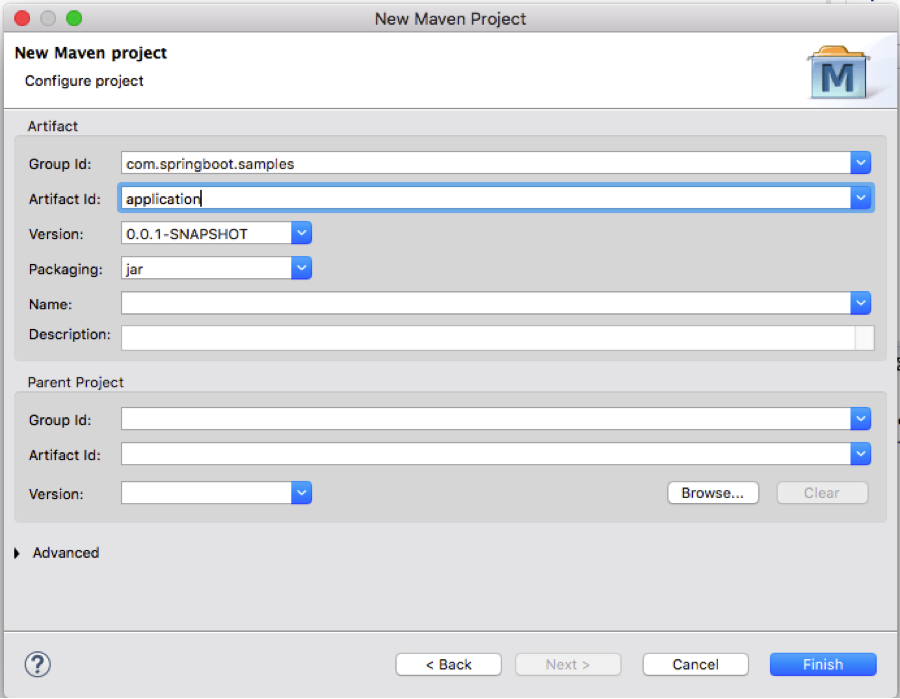
- Provide Group Id and Artifact Id and click Finish
- Note: If you need to deploy it to Amazon web services elasticstalkbean, make sure you put artifact id as application
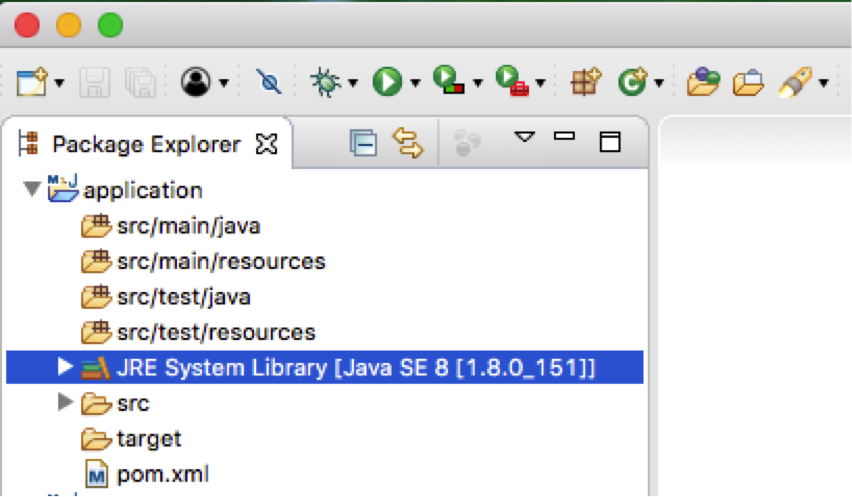
- The project created will have directory structure as per below screenshot
2] Add dependencies to pom.xml
First we need to add spring-boot-starter-parent as parent under project. It is used for default configuration of the components
<parent>
<groupId>org.springframework.boot</groupId>
<artifactId>spring-boot-starter-parent</artifactId>
<version>1.5.8.RELEASE</version>
</parent>
- Add the java version used under project
<properties>
<java.version>1.8</java.version>
<project.build.sourceEncoding>UTF-8</project.build.sourceEncoding>
</properties>
- Add dependencies under the project. This is used for default configuration of MVC web application
<dependency>
<groupId>org.springframework.boot</groupId>
<artifactId>spring-boot-starter-web</artifactId>
</dependency>
- Finally lets add the maven plugin to build the application
<build>
<plugins>
<plugin>
<groupId>org.springframework.boot</groupId>
<artifactId>spring-boot-maven-plugin</artifactId>
</plugin>
</plugins>
</build>
3] Create RestController
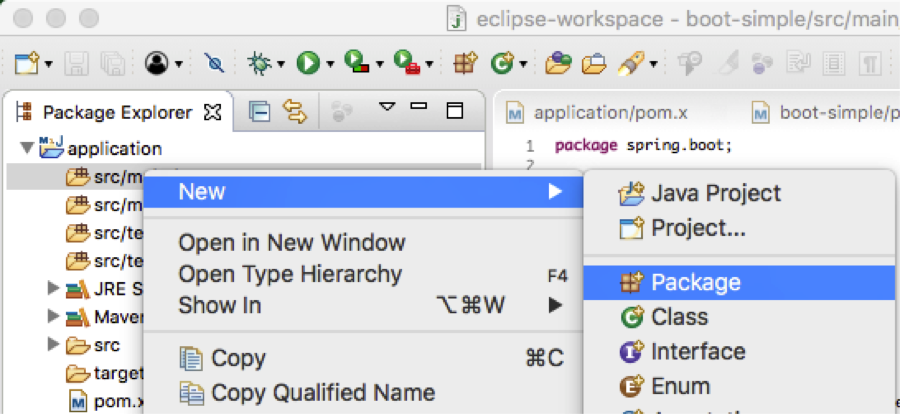
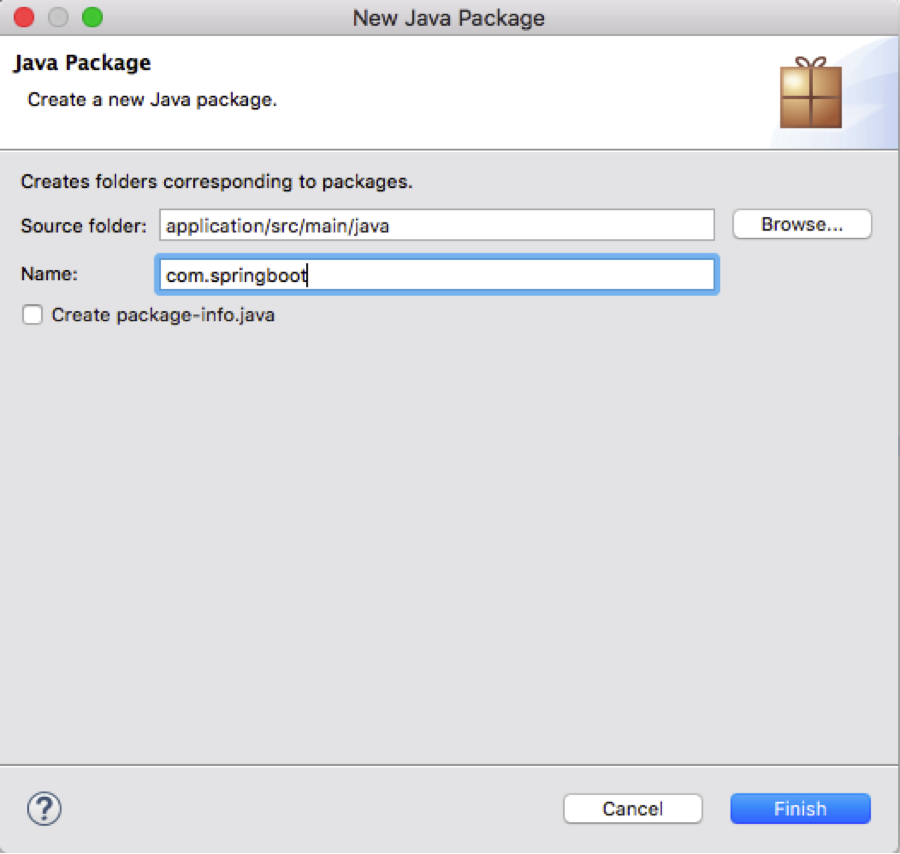
- Right click on src/main/java -> New -> Package
- Enter any package name and click Finish
- Right click on package newly created -> New -> Class
- Create new class called HelloController, can be given any name, but we have to configure it when initializing spring boot application which we will see in the next step
- Add @RestController annotation to the class name (You can also use @Controller to return model view, but here in this example to keep things simple we are using @RestController)
- Lets create a method to return greetings message
@RestController
public class HelloController {
@RequestMapping("/hello")
public String index() {
return "Greetings";
}
}
4] Initializing spring boot application
Lets initialize spring boot application by creating a class in same package called Application.java, can be any name but need to have @SpringBootApplicaation annotation. Here we can configure all the controller classes by passing it as an array of object
@SpringBootApplication
public class Application {
public static void main(String[] args){
Object[] obj = {Application.class,HelloController.class};
SpringApplication.run(obj, args);
}
}
5] Build and Run the application on local
- Right click on pom.xml -> Run As -> Run Configurations
- Right click on Maven Build -> New
- Enter appropriate name
- Select Base directory where the application is located. For configuration you can click on Workspace
- Goal has to be clean install
- Apply
- Run
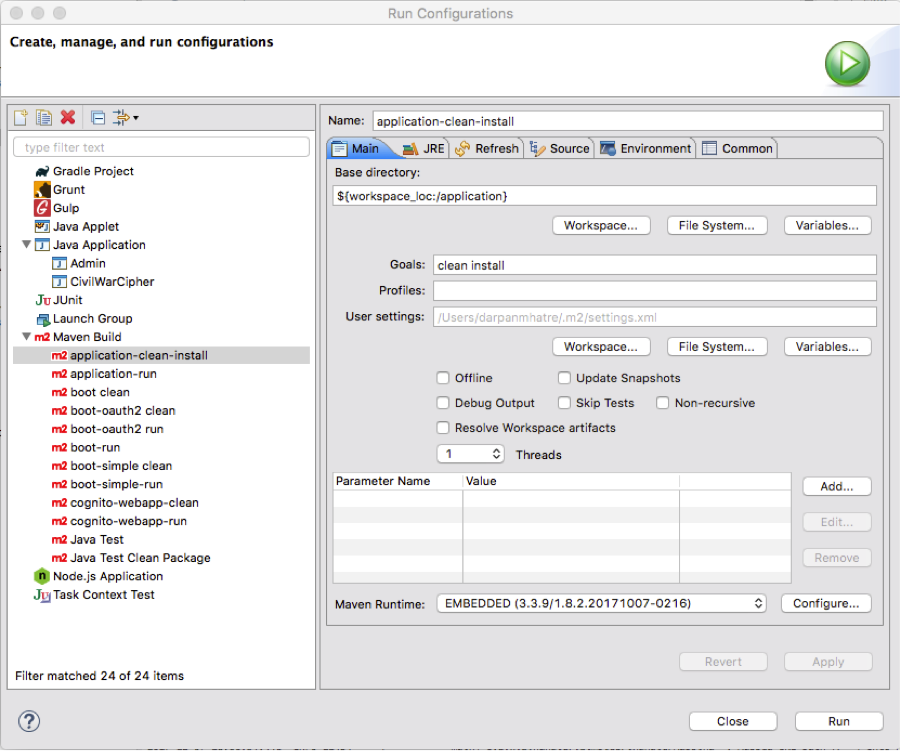
- Similarly, lets create another maven build except the Goal now has to be Spring-boot:run
- Apply
- Run

- You should see similar message, which says Tomcat started on port(s): 8080(http)
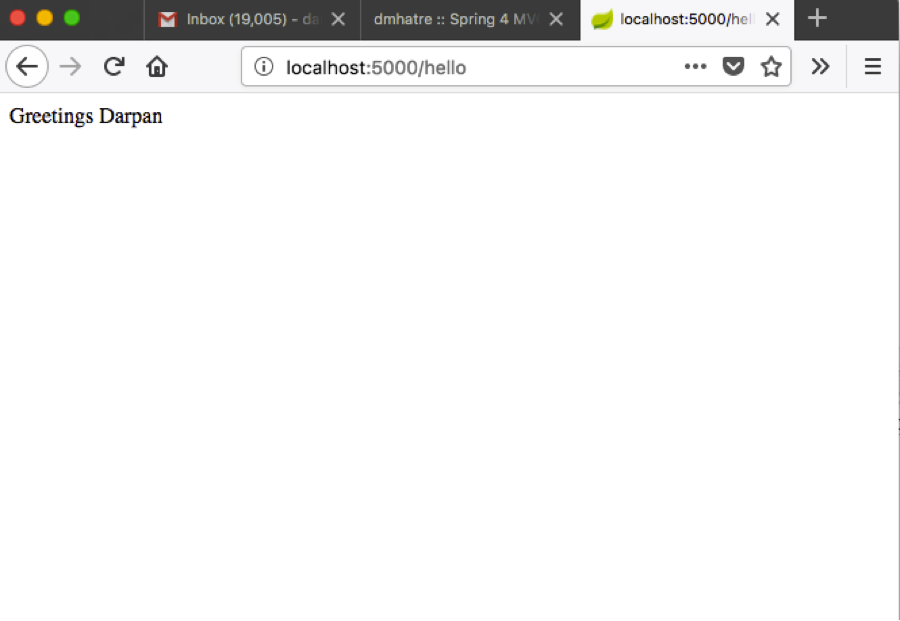
- Now you can open a web browser open http://localhost:8080/hello and you should see the message "Greetings"

6] Connection to MySQL
Now lets connect to MySQL server. In this example we are gettng the user name from user table by user id and display the greetings
Lets revisit pom.xml and add dependencies related to JDBC and MySQL
Add JDBC and MySQL dependencies
<dependency>
<groupId>org.springframework.boot</groupId>
<artifactId>spring-boot-starter-jdbc</artifactId>
</dependency>
<dependency>
<groupId>mysql</groupId>
<artifactId>mysql-connector-java</artifactId>
</dependency>
- Lets go back to HelloController.java and autowire the JdbcTemplate and write a code to review user name from the database
@RestController
public class HelloController {
@Autowired
private JdbcTemplate jdbcTemplate;
@RequestMapping("/hello")
public String index(){
DataSource ds = jdbcTemplate.getDataSource();
Connection con = null;
String s = null;
try {
con = ds.getConnection();
Statement st = con.createStatement();
ResultSet rs = st.executeQuery(" select first_name from t_user_main where user_id = 1 ");
while(rs.next()) {
s = rs.getString(1);
System.out.println(s);
}
} catch (SQLException e) {
e.printStackTrace();
}
return "Greetings "+s;
}
}
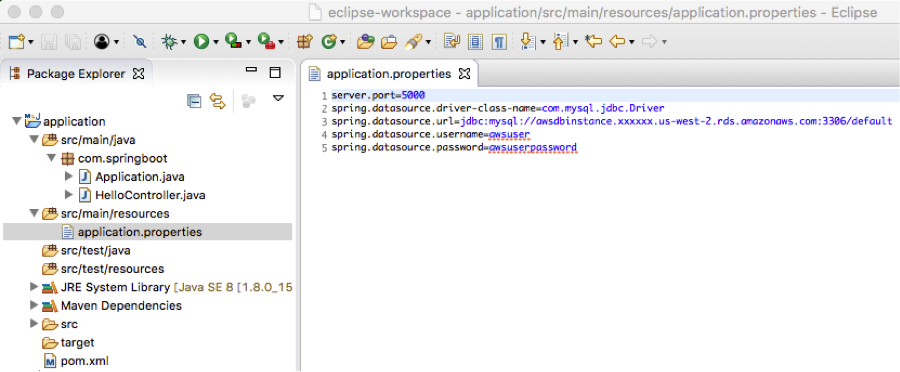
- Now this is the important step where we configure the application properties
- Lets create application.properties file under src/main/resources
- Lets first change the port to 5000
server.port=5000
- Now lets add MySQL connection properties
Example
spring.datasource.driver-class-name=com.mysql.jdbc.Driver
spring.datasource.url=jdbc:mysql://awsdbinstance.xxxxxx.us-west-2.rds.amazonaws.com:3306/default
spring.datasource.username=awsuser
spring.datasource.password=awsuserpassword
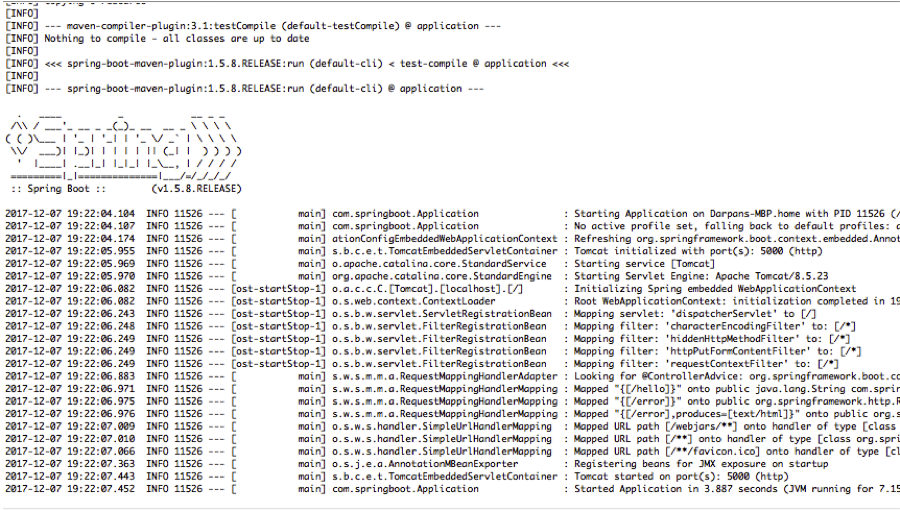
- Now if you build and run application again, you will notice that the application has been started on port 5000
- Now lets open the web browser and enter http://localhost:5000/hello and you should see the greetings message followed by the user name retrieved from database